Why Page Protection Matters
If your Framer site has any of these, you need page protection:
• A dashboard that shows user-specific data
• A members area with exclusive content
• An account page where users edit their profile
• A client portal with project files
• An admin panel for your team
Without protection, anyone who guesses or shares the URL can access these pages. Even if you don't link to them in your navigation, search engines can index them and people can stumble on them.
Protected Pages solve this by blocking access at the network level. The page literally never loads for unauthorized users — they're redirected to your sign-in page before any content appears.
How Protected Pages Work
When you set up Auth Plugin, two scripts are injected into your site:
Shield Script (runs in the head):
This script executes before your page content loads. It checks the current URL against your list of protected page patterns. If there's a match and the user isn't authenticated, it immediately redirects to your sign-in page. The protected content never renders — not even for a split second.
Relay Script (runs in the body):
This script manages the user's session. It stores and refreshes authentication tokens, keeps the session alive, and syncs auth state across browser tabs.
Together, these scripts create a seamless protection layer that works without any backend code on your part.
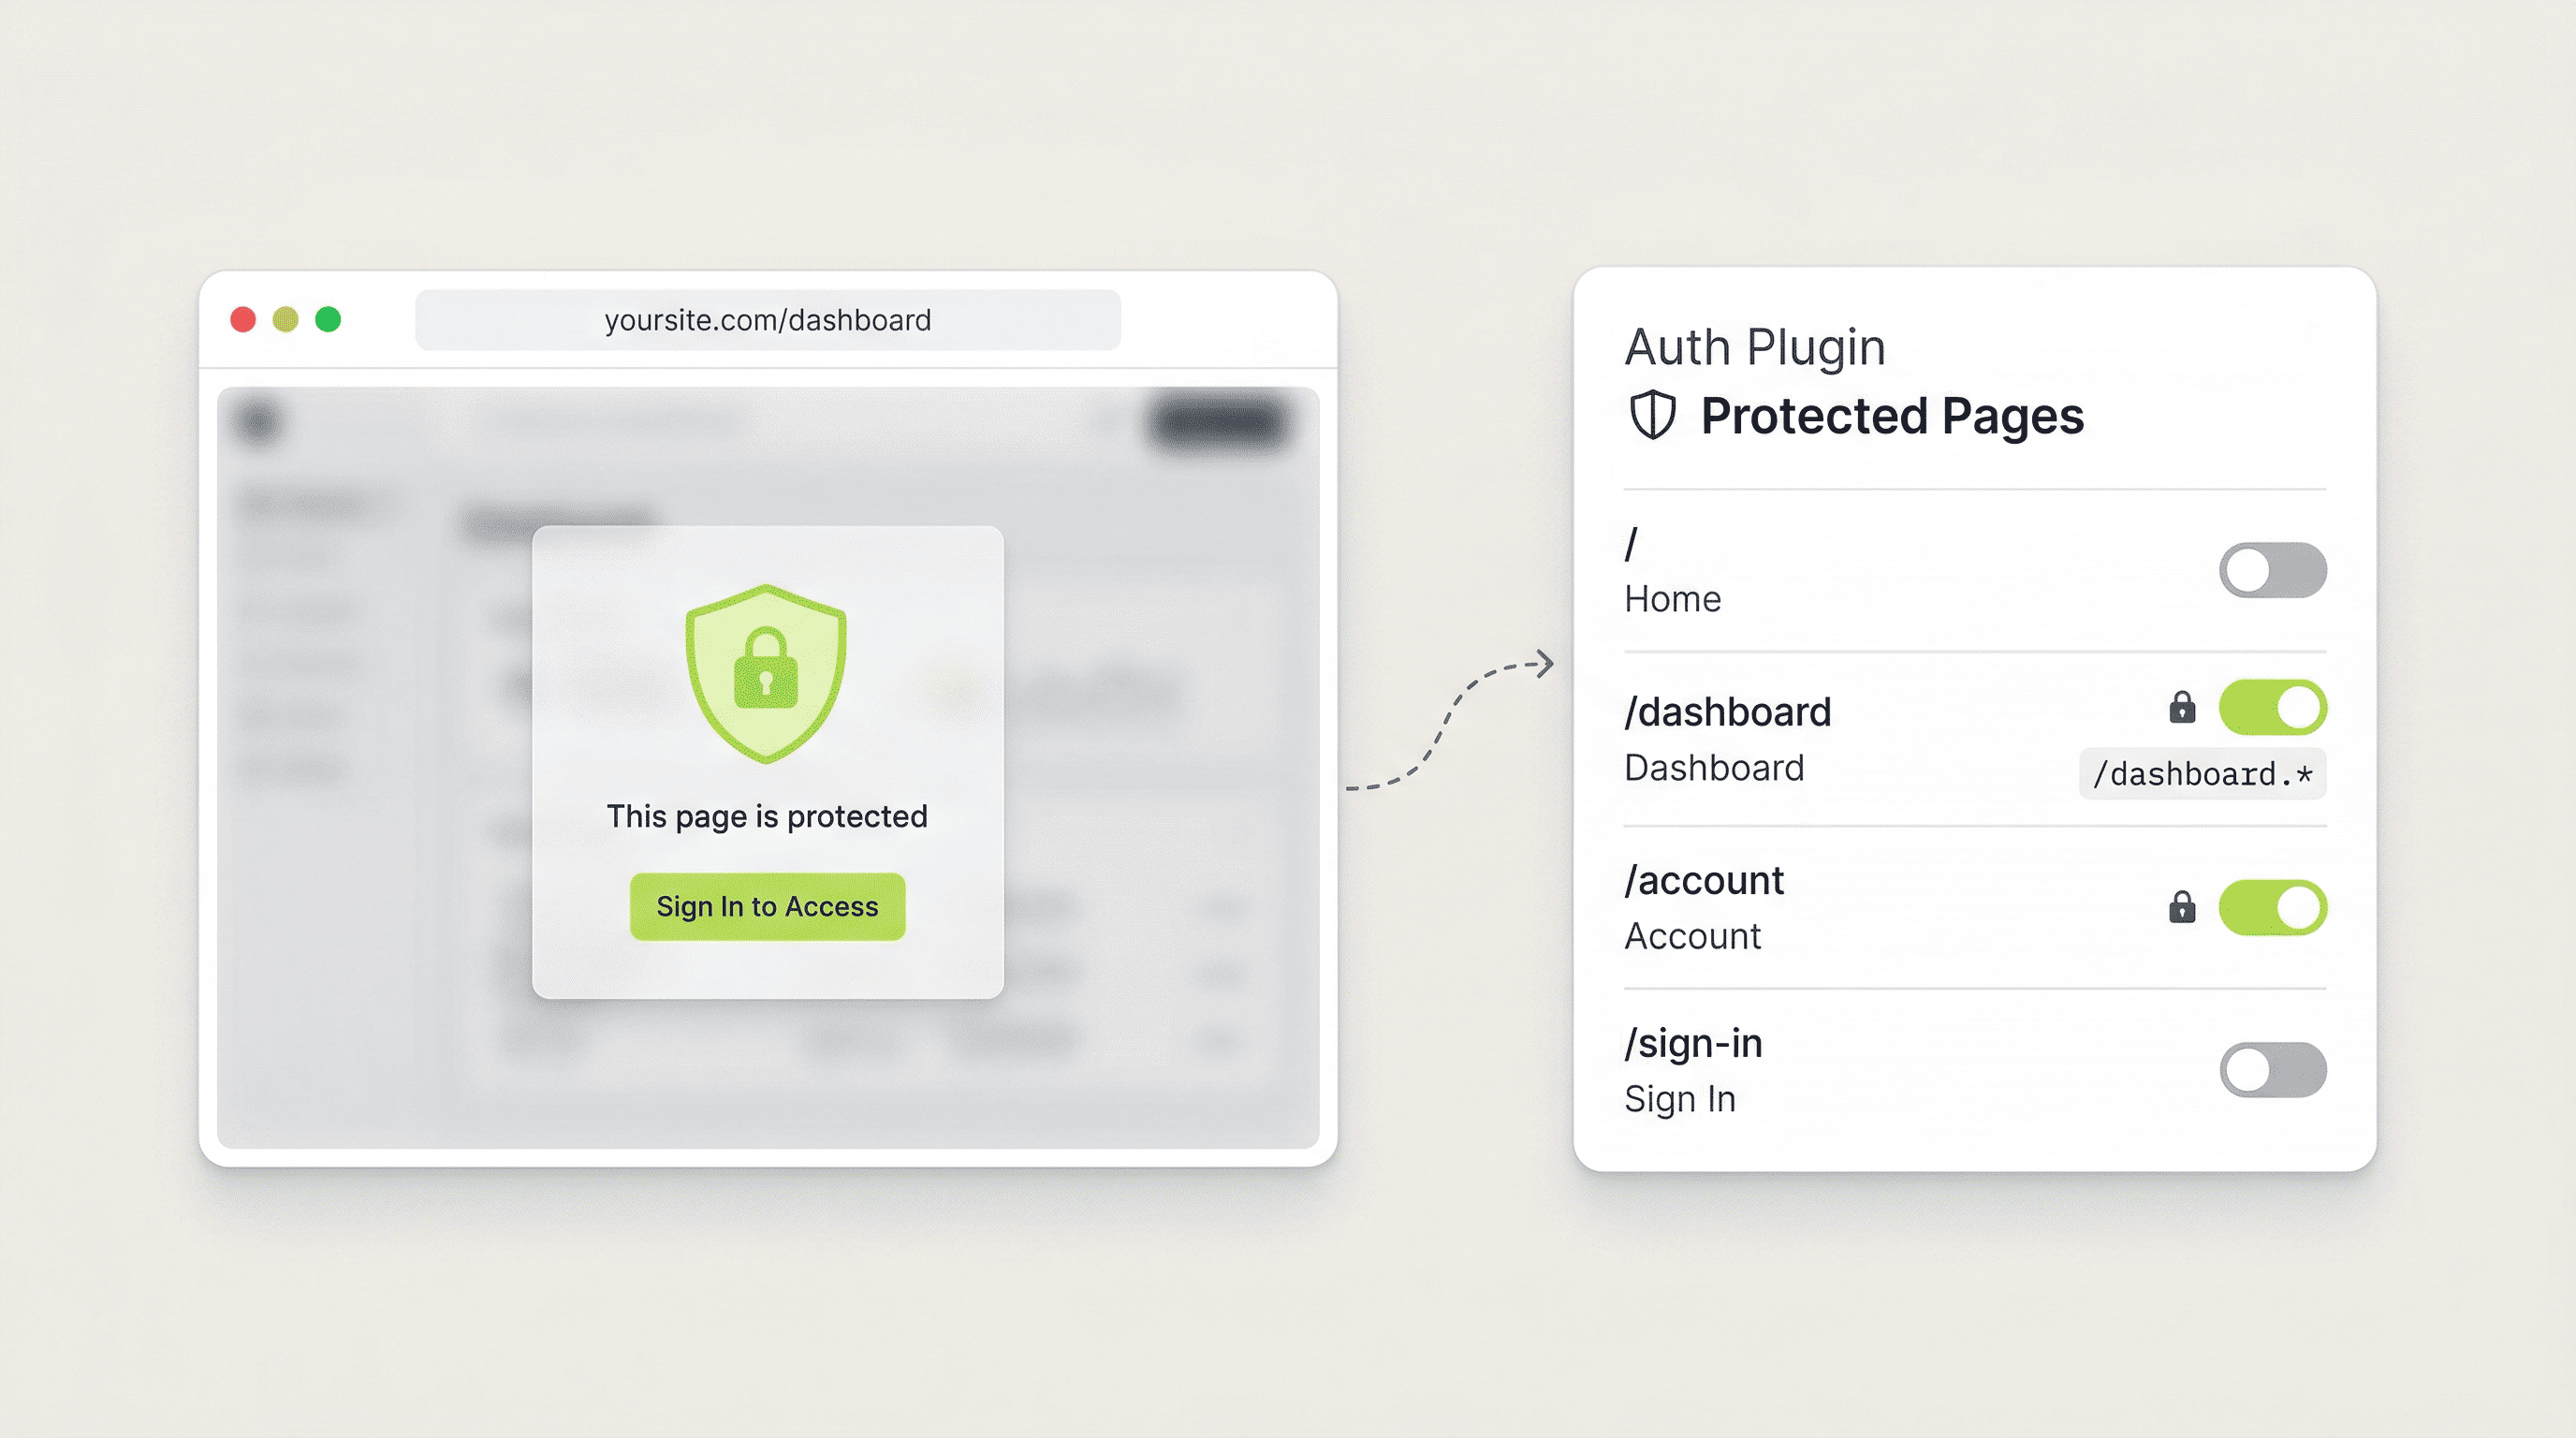
Setting Up Protected Pages
1. Open Auth Plugin in your Framer project
2. Go to Protected Pages
3. Click Add
4. Enter the page path — for example, /dashboard
5. The URL pattern is auto-generated (e.g., /dashboard.*)
The pattern uses regex matching, which means:
• /dashboard protects only the exact /dashboard page
• /dashboard.* protects /dashboard AND all sub-pages like /dashboard/settings, /dashboard/billing, etc.
Common setup:
• / → Not protected (public homepage)
• /sign-in → Not protected (login page)
• /sign-up → Not protected (registration page)
• /dashboard → Protected
• /dashboard.* → Protected (covers all sub-pages)
• /account → Protected
• /admin → Protected
Fine-Grained Control with Code Overrides
Protected Pages work at the page level — either the whole page is protected or it isn't. But sometimes you want more granular control. That's where code overrides come in.
Auth Plugin's code overrides let you control the visibility of any individual element on any page:
ShowWhenAuthenticated — Apply this to an element and it only appears when the user is signed in. Use it for "Welcome back" messages, dashboard links in the navbar, or premium content sections.
ShowWhenGuest — The opposite. Apply this to elements that should only appear for non-authenticated visitors. Use it for "Sign Up" CTAs, promotional banners, or login prompts.
IdentityName — Apply this to a text element and it dynamically displays the user's name. Use it for personalized greetings like "Hey, Sarah" in the header.
IdentityEmail — Same as above, but shows the user's email address.
TriggerSignOut — Apply this to any button or link and clicking it signs the user out.
To use overrides: select any element on your Framer canvas → click Code Overrides in the right panel → select AuthPluginOverrides → choose the override.
Real-World Protection Patterns
Pattern 1: Simple membership site
Public pages: /, /sign-in, /sign-up, /pricing
Protected pages: /members, /members/*
Result: Everything under /members requires login.
Pattern 2: SaaS with public marketing site
Public pages: /, /features, /pricing, /blog, /sign-in, /sign-up
Protected pages: /app, /app/*
Result: The marketing site is public, the app is protected.
Pattern 3: Course platform with preview
Public pages: /, /courses (course listing), /courses/preview
Protected pages: /courses/lesson-*, /dashboard
Result: Users can browse courses but need to sign in to watch lessons.
Pattern 4: Client portal
Public pages: /, /sign-in
Protected pages: /portal, /portal/*
Result: Clients sign in and access their private portal.
Testing Your Protected Pages
Always test protection on your published site (not in Framer's canvas preview):
1. Open an incognito window — This ensures you're not signed in.
2. Navigate to a protected URL — You should be immediately redirected to /sign-in.
3. Sign in — After signing in, you should be redirected back to the page you originally tried to access.
4. Check the content — Verify that the protected page loads correctly for authenticated users.
5. Sign out — Click the Sign Out button and verify you're redirected away from protected pages.
If a protected page loads briefly before redirecting, the Shield Script might not be inserted correctly. Re-run the setup wizard to fix it.